
I headed down to the North Store last night for some X-Wing, and was greeted by a smiling CaulynDarr. Who had just bought the shop's last Rebel Transport box. So of course we had to play a 300 point Epic-Format game (my first ever) to try it out.
The Lists
300 Points is a lot for X-Wing, as most games are 100 points. But that's the lowest point game that allows a Rebel Transport to be played. So I threw the following list together, using all but 3 ships from my Imperial collection.

The above list is 2 points shy of 300, because I screwed up and put defense lasers on the shuttle in addition to the heavy laser cannons. Sorry CaulynDarr!
The list itself is not very well optimized, because we were rushing through setup. Basically I just combined 2 lists that I was used to. Adding Vader and a shuttle for support.
Like me, CaulynDarr used all but 3 of his ships in his force:

X-Wing Squad Builder doesn't fully support the Rebel Transport yet, but here's what I've pieced together from my very fuzzy photograph of his cards, and some google-foo:
GR-77 Transport w/Duty Free, Frequency Jammer, Engine Booster, Navigator, Carlist Rieekan
Basically, it's built to jam and otherwise interfere with an enemy force. Putting out lots of stress tokens on enemy ships.
Deployment

Normal games of X-Wing are played on a 3' x 3' field. But epic games
require a 3' x 6' field. So CaulynDarr and I put together each of the 3' x 3'
felt squares that we carry around. I won the rolloff, so I was able to
start placing asteroids first. Getting most of them away from my side of
the table. Just like in the movies, Tie Fighters love to hit asteroids,
so I didn't want them anywhere near me.

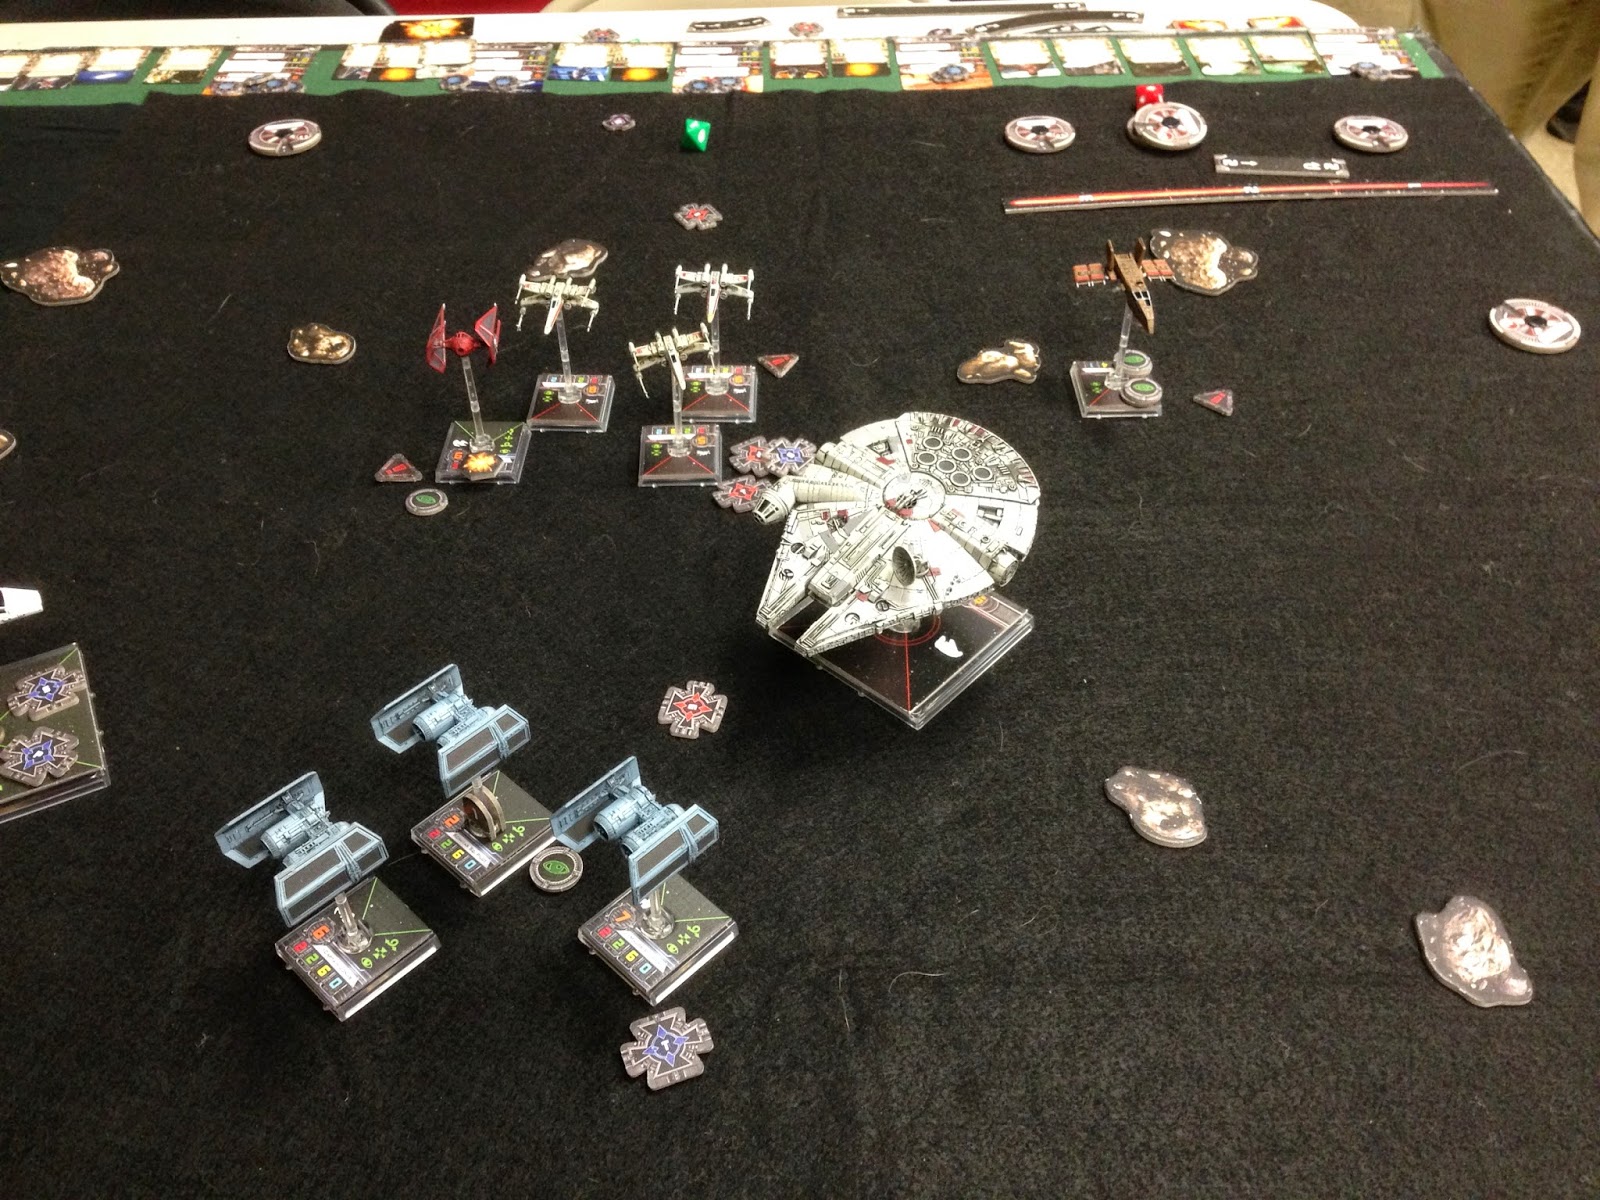
I put my Tie Bombers in the right-center of my line, along with the shuttle. Figuring that together, they'd bash whatever came at them. The shuttle was supposed to hand off target locks to the bombers, and Captain Jonus would give the shuttle re-rolls with its heavy laser cannons. Plus re-rolls for the Tie Bombers around him.

The Howlrunner Tie Swarm went to the middle-left. Where only 2 B-Wings opposed them. Lorrir, the Tie Interceptor than can do curved barrel rolls, took the left flank. The Royal Guard Tie Interceptor took the right, and Vader took center. With the idea that he could zoom whichever way he was needed.

CaulynDarr anchored his left flank with Han Solo and Jan. With 3 X-Wings (2 of them new pilots) on the center-left.

The Transport took center-right, and the B-Wings took the right flank.

Oh yeah, I forgot to put Howlrunner out. Ooops, backwards too!

All set to go.
Turn One

Everyone moves up, though I hold the bombers back a bit. The Rebel Transport hands the closes Tie a Stress Token.

Royal Guard Tie sees Han coming and zooms away. Han still manages to get a hit on him through the asteroid. Nobody else is in range.
Turn 2

I'm figuring that I'll crush the B-Wings first, then move right, killing the transport. Vader, nursing a hangover, narrowly avoids hitting the shuttle. Which moved further forward than he had expected. Not a great start.

Still, if I can sweep the left, I can theoretically hit the X-Wings, Jan, and Han with more weight of ships.

CaulynDarr's goal is obviously to hit and crush my left first. Target Locks are acquired by most everyone.

Awe... look at that cute little transport. He's so....

AHHHHhhhh!!!
That thing moves faster than I thought (Engine Booster). It runs right over a Tie, killing it automatically.
The other Ties shoot at the B-Wing in the clear but only manage to take down a couple of shield points. Oh boy, it's gonna be one of THOSE games...

Thanks to the Rebel Transport... Vader, already hungover... Starts seeing random Game of Thrones clips appear on his tactical displays. Ah look, the dragon girl is going to show her... Noooooooo! It's censored!!! He hits the shuttle AGAIN.
Tie Bombers are gonna concentrate fire on the first X-Wing, but... wait... who's taking away our target locks? Is it the whale-ship over there, or that new X-Wing with the yellow stripe? Crap!
Anyway, they manage to take down 2 shield points. Oh boy. It's gonna be one of those games...
The Royal Guard Tie at least manages to get out-of-arc from anyone that could shoot at him.
Turn 3


Major Rhymer swings right to avoid the Falcon and smacks into an asteroid. The other two Tie Bombers intend to unleash hell on Jan. The Shuttle moves up, ready to help with Jan or kill an X-Wing. Vader manages to get away from that damn shuttle, but is too stressed to do much more than fly straight. Seeing as how he just saw the end of "Rains of Castamere" a season too early.

Those stupid B-Wings are still alive. I've got 5 Ties on one, and the other is thinking that Vader looks like a juicy target.

Stupid B-Wing on the left still has one hull point remaining.

Tie Bombers whiff on Jan. The shuttle whiffs too. My illegal defense laser upgrade kills an X-Wing that lands on the shuttle's base.

FINALLY! The last tie to fire kills the B-Wing on the left. The one on the right kills a tie. The Transport makes whale noises and keeps moving to my right. Disappointed that it can't put another stress token on Vader.
Turn 4

Han zooms up to the middle. Jan moves up past my leading Tie Bomber's arc. The Royal Guard Tie finally has a decent position to the rear of Jan's HWK.

Wedge zooms right to go after Vader. The shuttle moves one, clearing its stress. But hits the X-Wing in front of it. Letting it remain where it is.

Run B-Wing. Run Fast.

CaulynDarr's Transport narrowly avoids colliding with his own B-Wing. Awe...

The swarm shoots, but the B-Wing still lives.

Vader somehow avoids being killed by Wedge (5 attack dice!). But Han takes the Shuttle down.

The Tie Bombers whiff on Jan. So does the Royal Guard Tie, who's getting demoted to sanitation guard after this.
Turn 5

Hope is fading fast for the Imperials. But maybe we can do some damage before we retreat?

Ties are still chasing that stupid B-Wing. Wedge, who started on the other side of the freaking table, zooms over to help out. The Tie Bombers are circling around to try and get a shot on him. The Royal Guard Tie is lined up on Wedge perfectly, but Luke is manning the Falcon's guns, and blows him away first.

The Whale floats on. I think this is when the guys in the transport opened up the bar might as well enjoy a few drinks while they watch what happens to Vader, who's trying to dodge Han and the other X-Wing. The B-Wing is just laughing at Howlrunner now.
Turn 6

Stupid B-Wing. Vader runs back towards the Imperial line to chase an X-Wing. The Tie Bombers turn around to fire on the Falcon.

Vader takes out the X-Wing in front of him.

Really? STILL??? What the hell is that B-Wing made of? Y U NO KILL IT?

The Falcon loses a couple of shield points. Big whoop.

Vader bites it. Was it Jan or Han? Do I really care at this point?

Wedge kills the last Tie Interceptor, and I call it. Give that B-Wing a Steel Wall medal.

Rebels win.
Aftermath
There's some changes I could make to the list to make it better. But I lost this one at deployment. Made worse by not moving everything I had on the right towards my left during the first 2 turns. Which would have allowed me to kill the Transport and thin out the rebels to my right as they had to chase me.
It was a fun game, but I'm still a very middling X-Wing player. :)


300 points push my collection to the limit. Way to many upgrades required to get to that point level to have a good list. I guess I would have to buy more ships but that is probably their idea. Probably will be better by the time the next wave and the Rebel aces box comes out, though.
ReplyDeleteIt was really a lot of fun. The wider field alone allows for better maneuvering and flanking tactics.
Delete